


mattY
-
Joined
-
Last visited
Posts posted by mattY
-
-
iniBuilds A300-600R Airliner Premium V1.0.8 Update 🚀
The iniBuilds A300-600R Airliner Premium v1.0.8 update is now available, bringing a focused set of improvements to the aircraft’s thrust reverser audio experience. This update refines reverser volume behaviour for smoother transitions, improves sound positioning to provide better audible range between the cockpit and cabin environments, and corrects the overly high-frequency hiss previously present during reverser operation.
This update can be downloaded via the iniManager.v1.0.8
Changed thrust reverser volume curves to be less abrupt
Modified thrust reverser sound positioning for more audible range from cabin - cockpit
Fixed thrust reverser producing mostly high frequency hissing noise
-
 2
2
-
v1.0.2 of iniBuilds Dubrovnik (LDDU) for MSFS has been released. This update improves overall scenery compatibility and visual bugs, adding new spawn positions whilst resolving jetway transparency issues, package conflicts, and FS24 character placement problems. It also includes LOD adjustments to large structures for smoother rendering and reduced late object swapping.
This update can be downloaded via the iniManager.
v1.0.2
Added 1A, 4A and 16A spawn points (10A not added due to jetway conflict)
Fixed jetway glass transparency/reflection issue
Fixed possible conflict with other ini packages
Adjusted LOD values to large structures to fix late swapping
Fixed floating/sunken people in FS24
-
iniBuilds TriStar Airliner V1.0.6 Update 🚀
The iniBuilds TriStar Airliner v1.0.6 update focuses heavily on refining core aircraft systems, navigation logic, and overall flight behaviour, with major improvements to VNAV, INS functionality, climb/descent handling, fuel systems, cabin/environmental logic, and autopilot reliability. Alongside a range of visual fixes, this update also expands the PFB with new quality-of-life features including Progressive Fuelling & Loading, Pause at TOD functionality, Auto-Fuel Management, and enhanced map options for improved operational usability.
This update can be downloaded via the In-Game Marketplace.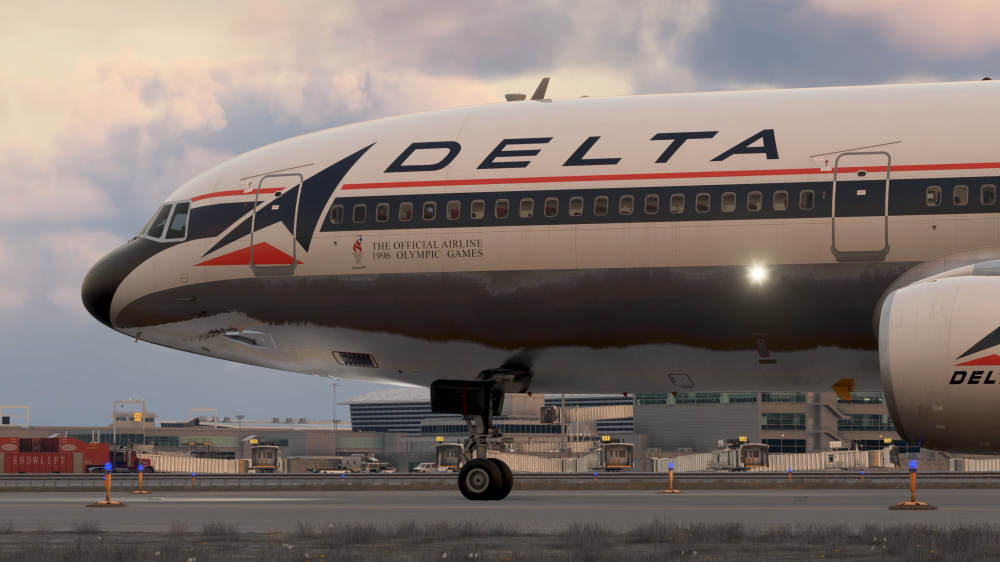
V1.0.6
SYSTEMS ⚙️
FIXED FO PMS not showing TOD when data input
FIXED Stall test does not work
FIXED PMS gives too high climb EPR
FIXED Measured Pack Flow Logic Reversed
FIXED Cabin Zone Temp jumps instead of gradual increase with APU Air
FIXED Climb pitch modes can lead to loss of control
FIXED When flying in LBS, FF Gauge Decimal is in wrong position
FIXED TM mode goes to 000 EPR if AP is off
FIXED INS cannot check drift results post flight in INS due to wp parsing error
FIXED APU EMER SOV (Fuel Panel) remains illuminated after APU shutdown
FIXED SPI - Rudder shows full left deflection, however it is faired and straight
FIXED SPI - Elevator indications do not work
FIXED Fuel loading distribution is incorrect
FIXED Cabin temp very low in flight, regardless of the temp selector position
FIXED All INS units - Cannot TK CHG 0 to X if there are "empty" waypoints between 0 and X
FIXED INS 9 - 1 deletes manually added waypoints after using auto import
FIXED INS MAP (1/2/3) does not erase/reset when all waypoints are wiped from INS
FIXED Unable to reset or erase imported waypoints
FIXED ILS Mode - Aircraft will climb to capture GS if intercepted from below instead of maintaining present ALT
FIXED RMT functionality of ranging still causes leg to be reset to 0-0, which is wrong and breaks navigation
FIXED VNAV - After intermediate level off in CLB, dialing new altitude+pressing VNAV mode button does not automatically update TM to CLB epr value
FIXED VNAV - After intermediate level off in DES, dialing new altitude+pressing VNAV mode button puts the plane in a +500fpm climb initially
FIXED VNAV - In descent, does not transition to 250KIAS quickly enough
ART 🎨
FIXED Reversers do not animate via HOLD THROTTLE REVERSE THRUST
FIXED Paintkit - missing stabilizer texture
FIXED Missing blue transit lights for fuel jettison
PFB📜
FIXED CG icon not initialized or has an issue
FIXED Current GW vs fuel system GW discrepancy
ADDED Progressive Fuelling and Loading
ADDED Pause at TOD - Dist to Dest or Timer based
ADDED Auto-Fuel Management System
ADDED Option to Enroute Page to Toggle Own A/C Position on Map
iniBuilds Team ❤️
-
1
-
iniBuilds A350 Airliner V1.2.6 Update 🚀
The A350 Airliner v1.2.6 update is out now! This is a small update to further improve WASM stability alongside fixes to the auto-derate system, weather radar GPU state behaviour, and the EFB pause message flickering issue that would occur under heavy sim load states.
This update can be downloaded via the iniManager.

V1.2.6
SYSTEMS
FIXED - Further WASM Stability enhancements
FIXED Auto-derate function not triggering properly
FIXED WXR on in on GPU state
EFB
FIXED Flickering EFB pause under heavy sim load states since SU5
iniBuilds Team ❤️
-
4
-
v2.5.6 of the iniManager has been released. This is a small update that addresses some minor background bugs.
This update will be downloaded automatically when you launch the app or you can manually download it here.
v2.5.6
Fixed various minor background bugs.
-
v1.0.1 of iniBuilds Palm Springs (KPSP) Enhanced for MSFS 2024 has been released. This update addresses a few terraforming issues across taxiways, fixes an issue with gate 4, removed custom wind turbines to prevent duplicate turbines showing and includes a fix for AI pathing bugs.
This update can be downloaded via the iniManager.
v1.0.1
Corrected various terraforming issues across taxiways
Gate 4 parking moved slightly to allow for correct jetway operation
Removed custom wind turbines
Fix for AI pathing issues
-
v1.0.3 of iniBuilds Innsbruck (LOWI) for MSFS 2024 has been released. This update fixes a few areas of the scenery in MSFS 2024 such as the ski jump model having some terraforming issues, some missing autogen houses from imagery, a GSE LOD issue and sunken buildings.
This update can be downloaded via the iniManager.
v1.0.3
Fixed ski jump default model showing and terraform issues
Removed missing autogen house from imagery
Fixed GSE LOD issue
Fixed sunken LOJO building
-
1
-
v1.0.5 of iniBuilds Southampton (EGHI) for MSFS has been released. This update addresses the runway lead-in arrow and centreline misalignment as well as adjusts some GP colouring and grass aprons.
v1.0.5
Fixed minor runway lead-in arrow and centreline misalignment
Adjusted some GP colouring and updated grass aprons
-
v1.0.2 of iniBuilds Hong Kong (VHHH) Premium for MSFS 2024 has been released. This update addresses a few smaller issues relating to taxi signs, gate numbers and some misplaced cars.
This update can be downloaded via the iniManager.
v1.0.2
Duplicated taxi signs
Missing internal gate numbers
Floating artefacts
Misplaced cars in carpark
-
iniBuilds TriStar Airliner V1.0.5 Update 🚀
Version 1.0.5 is here, and it addresses a few key areas, there’s a lot packed in! Across the aircraft, we’ve made a wide range of improvements based directly on your feedback. On the systems side, that includes fixes to electrical behaviour, pressurisation, INS, and flight controls. Some key highlights are corrected IDG oil temperature readings, improved go-around and TOGA behaviour, a working stick shaker with proper vibration, and a pressurisation system that now behaves as expected.
The INS has also been refined, with remote waypoint loading and post-flight accuracy checks now working again. A number of smaller but annoying issues have been cleared up too, like ALT ALERT flashing incorrectly, ILS lights acting up during taxi, and the DH light triggering when it shouldn’t. We’ve also made targeted fixes to the PMS, including climb speed logic and BOD limits, along with restoring missing GPWS alerts and correcting a few visual quirks like cabin lighting in Cold & Dark.
Overall, this update focuses on refining and tightening the experience across the board, with a strong emphasis on improving day-to-day usability. It builds on an already solid foundation, as the TriStar continues to evolve with an expanding set of features that improve accuracy, streamlines workflows, and brings greater depth and realism to every phase of flight.What’s been added since release ✈️
Since launch, the TriStar has continued to grow with a range of new features and enhancements that expand both operational capability and overall immersion:
Enhanced PFB (Paper Flight Bag) functionality
The PFB has been significantly expanded, now featuring an enroute map with SimBrief route overlay (magenta) and live aircraft track (orange) for improved situational awareness. Additional usability upgrades include a rudder/tiller control option for flexible hardware setups, and a “SYNC” function on the landing performance card to streamline workflow and data entry.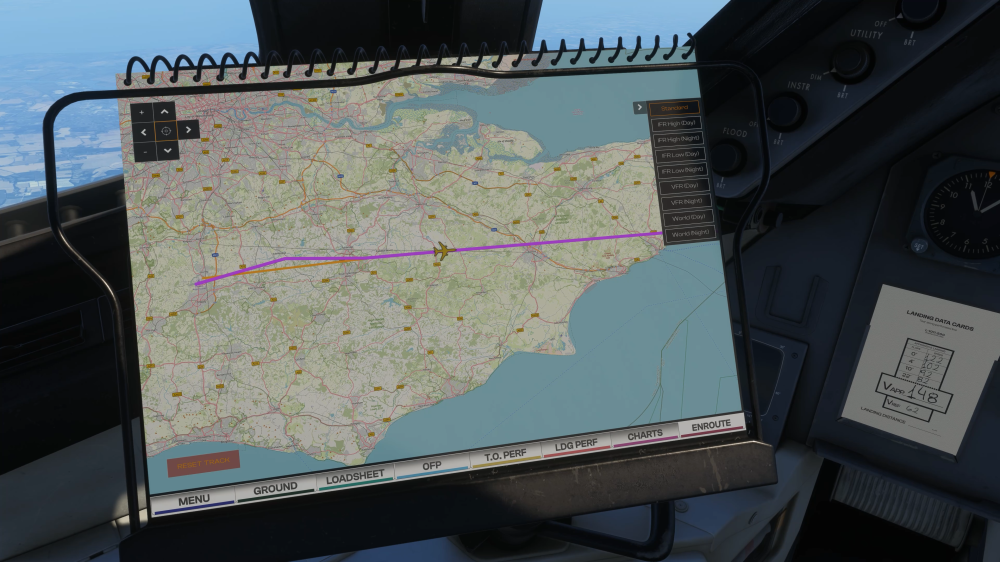
Improved navigation & INS capability
The INS system has been further developed with remote waypoint entry, allowing synced input across multiple units, alongside the ability for each INS to independently draw routes on the map display. In addition, autopilot control via INS3 has been introduced, offering more authentic navigation procedures.Expanded aircraft systems & realism
Key systems have been enhanced with the addition of a fully functional fuel jettison system (with visual effects), brake temperature simulation displayed on the FE panel, and refined engine behaviour with subtle parameter variance (N1 / TGT / EPR) to create a more organic, less “perfect” feel.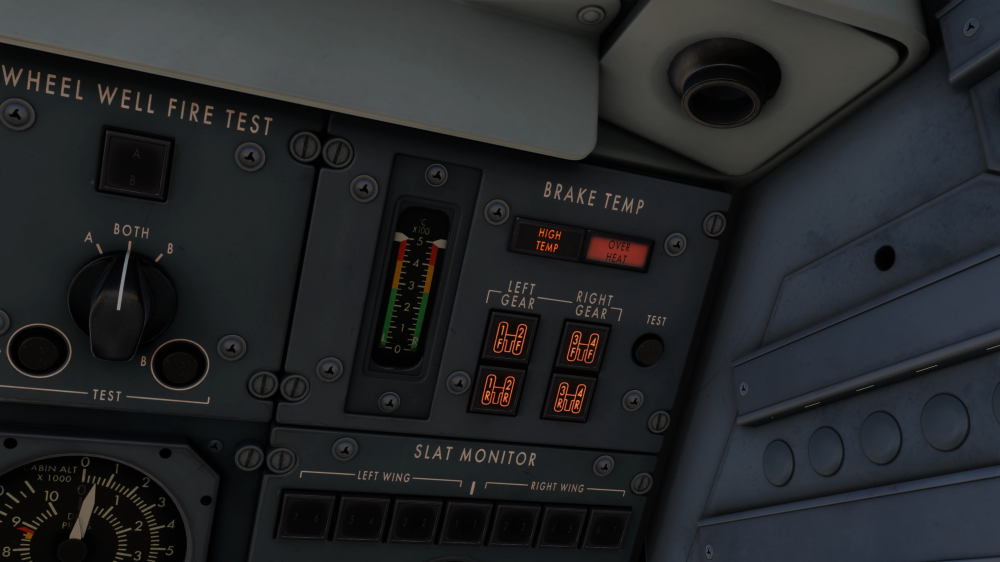
Safety systems & alerts
TCAS functionality now includes test capability and RA audio alerts, while GPWS has been expanded with Mode 1 and Mode 5 warnings, delivering accurate “PULL UP” and glideslope deviation callouts when required.Flight deck & operational tools
A Takeoff & Landing Data Card has been added to the captain’s side, giving quick access to key performance data during critical phases of flight.Visual & immersion improvements
Additional effects such as engine start-up smoke help bring more life to the aircraft, complementing the growing depth of systems and interactivity.s (N1 / TGT / EPR )
All of these enhancements are highlighted in our latest update video, giving you a first-hand look at what’s new. Be sure to check it out to see these additions in action.
Watch The Trailer 📽️
Features coming soon? 👀
We’re not done there! Development on the TriStar is still ongoing, with even more features and QoL upgrades already in the pipeline. From subtle improvements like PFB Pause at Top of Descent, to deeper immersion through progressive aircraft loading, and streamlined workflows with direct SimBrief import into INS3, there’s plenty more on the way. As always, we’ll continue building on this platform with the goal of delivering an even more complete & refined experience!
This update can be downloaded via the In-Game Marketplace.
V1.0.5
SYSTEMS ⚙️
FIXED INS remote loading of WPTs not working
FIXED ELEC: IDG oil temp/rise inop
FIXED ELEC: FLT STA BUS FAIL lights inop
FIXED Auto TOGA logic
FIXED Stick Shaker Activation & vibration animation
FIXED Pack 2 latched in but no indications on the pack panel
FIXED Automatic Go-around
FIXED DH light comes on when Radio Altimeter comes alive
FIXED Add minima reference bug for the barometric altimeters
FIXED Stall test does not work
FIXED LTN Sequences when MODE Switch is in Manual
FIXED Cabin pressure control panel will randomly fault on climb
FIXED Getting positive pack flow indications on pack 2 with bleed air & packs off
FIXED Pressurization system sets cabin pressure nearly instantly, ignoring rate setting
FIXED Cabin Temp not affected by external A/C Cart
FIXED CWS not working correctly
FIXED On spawn cabin altitude was way above apt elev
FIXED Unable to do INS post flight accuracy check
FIXED ILS Deviation light kept flashing on taxi-out
FIXED ALT ALERT light keeps flashing erroneously
FIXED PMS Limits Numbers Input for BOD to 999
FIXED ATM RPM in Auto - needle logic
FIXED PMS IAS>Mach transition during climb
FIXED ALT randomly updating target automatically without mode change
FIXED Panel states triggering TCAS TEST
ART 🎨
FIXED C&D lounge ceiling lights remain on
PFB📜
FIXED Add FE Baro Sync setting to PFB Altimeter Sync Option
FIXED Ready for Takeoff Panel state - only starting ENG2
FIXED Ready for Takeoff Panel State - missing items
SOUNDS🔊
FIXED GPWS - Mode 1 & Mode 5 alerts missing
iniBuilds Team ❤️
-
4
-
iniBuilds TriStar Airliner V1.0.4 Update 🚀
Another week, another step forward for the TriStar Airliner. Version 1.0.4 is another great update, delivering a broad range of fixes alongside several exciting new additions, all driven by your continued feedback from the community.
This update addresses critical stability issues including instrument freezes on the Captain's side, spoiler deployment logic, and a number of INS-related fixes including drift modelling, track accuracy, and display improvements. The PMS has also received significant attention, with dynamic fuel integration, corrected Opt Alt calculations, and formatting fixes across multiple pages.
On top of the fixes, V1.0.4 introduces Fuel Jettison, an enroute map path display, dynamic fuel on PMS pages, and several PFB quality-of-life additions including map dragging, a SYNC button for the Landing Performance Calculator, and a rudder/tiller toggle option.
As always, thank you for your patience and continued support, more improvements are already on the way. Enjoy the TriStar! ✈️This update can be downloaded via the In-Game Marketplace.

V1.0.4
SYSTEMS ⚙️- FIXED INS WIND display formatting
- FIXED PMS: TO Page formatting
- FIXED User Cannot Change INS Track on Bottom INS
- FIXED No annunciations on the panel when trying to perform an Autoland
- FIXED DC BUS 3 remains powered without power to AC BUS3 with DC tie open.
- FIXED PMS: LANDING page EPR format
- FIXED Anti skid shows ON with gear up
- FIXED Fuel Temp Drop values incorrect
- FIXED Add randomized variance in engine parameters
- FIXED APU startup logic Incorrect
- FIXED HSI Shows True North When in INS Mode
- FIXED FM - hard pitch up with speed brakes engaged
- FIXED Generator Breaker Flow Bars Randomly Extinguish
- FIXED Captain Side Instruments/Avionics Freeze During Flight
- FIXED CPT Side INS & INS Related Instruments Freeze
- FIXED Main instruments "failed" with flags mid-flight
- FIXED Spoilers not fully deployed despite lever being fully extended on rollout
- FIXED Thrust Master TCA Throttle Calibration Issues
- FIXED PMS - Opt Alt is too low
- FIXED Tank 1A/3A reads 0.9 when its empty
- FIXED TANK PUMP valves are still all showing flowbars on startup
- FIXED Texture Artefact - seatback pouch in economy class
- FIXED BATC - COM2 is permanently showing OFF
- FIXED GPS randomly resets itself in flight
- FIXED INS Loses Track Overflying GWC
- FIXED GPS deviation: wrong wind correction
- FIXED Add center on position/lock to aircraft button on center display
- FIXED Make GW on the PMS a dynamic value using fuel consumption
- FIXED Pack issues due to CAB ALT starting higher than a/c at C&D
- FIXED Glideslope discrepancy HSI/ADI
- FIXED Add INS drift to INS waypoints as well
- ADDED Fuel Jettison
- ADDED Add path to enroute map (like in 340/350)
- ADDED INS Display can now display path from all 3 INS
- ADDED Add dynamic fuel to the PMS pages
- FIXED Hydraulic ATM test position doesn't appear to work
- FIXED Nosewheel turns too far with rudder pedal input
- FIXED FM feedback, noticing some rudder "lag"?
- FIXED Setting NAV1 via default sim EFB doesn't change displayed frequency
- FIXED AFCS LOC/GS (arm & active) indications do not show when AP is off
- FIXED Spoilers Do Not Deploy when configured
- FIXED TANK 1 QTY indicator 100s digit is not updating/ counting down
ART⚙️
- FIXED Circuit Breakers not animated
- FIXED PMS brightness knob inop
- FIXED Improved VRAM consumption
- FIXED A few lighting knobs dont have the triangle emissive
- FIXED Add Perf Card to CPT Side
- FIXED Engine smoke should start when fuel introduced, not on starter motor
- FIXED All lavs have the please lock door on the outside
- FIXED Pod variant, ENG3 cowling clips pod when open
- FIXED ENG2 mechanic missing eyeballs
- FIXED Enroute Map UI Buttons disappear when navigraph not signed in
- FIXED FE Panel - EXT power switch not springing back to "off" when unpowered
- FIXED Spoilers not going down visually with lever when ABRK disengages
PFB⚙️
- FIXED cargo loading logic leading to CG out of limits
- FIXED Chocks ON + GPU connected on gate spawn
- FIXED Cannot scroll through pages of multi-page LIDO charts in EFB
- FIXED PFB, map: move displacement icons a bit down
- FIXED Add version number to PFB
- FIXED Show / hide card
- ADDED Map dragging added
- ADDED Add "SYNC" button to Landing Perf Calculator
- ADDED Add toggle option "RUDDER CONTROLS TILLER"
SOUNDS⚙️
- FIXED Chock state affecting ambient external sounds
- FIXED STBY pwr switch makes a double click sound
iniBuilds Team ❤️
-
6
-
v1.0.4 of iniBuilds Liverpool (EGGP) Premium for MSFS 2024 has been released. This update focuses on overall performance and visual improvements across the airport, including optimised lighting, improved LODs, and the use of Sim Props for better efficiency. It also enhances realism with additional ground clutter, vegetation, and airfield details, while addressing various lighting issues and environmental fixes around the terminal and taxiways.
This update can be downloaded via the iniManager.
v1.0.4
- PERFORMANCE update to Terminal (Reduced lights, Implemented Sim Props, Improved LODs)
- FIXED lights flickering/disappearing in multiple aircraft including Fenix A320
- ADDED GSE Clutter outside hangars / block 32R
- ADDED airfield barriers at edge of Gate 10
- FIXED L holding point signs should be Red/Black/White
- FIXED landscaping near helicenter
- FIXED fence coverage near skyport hangar
- ADDED trees/bushes to perimeter roadside / Hale Rd
- ADDED tree/landscaping assets to field next to runway
- ADDED taxiway edge lighting at T taxiway entrance
- ADDED reflectors across the taxiways between U and V
- ADDED fencing around the long stay carpark and down to the FedEx entry road
- ADDED aircraft spawn position for the skyport hangar
- ADDED more trees in marked area abeam Taxiway A between T and L -
v2.5.5 of the iniManager has been released. This is a small update to add a few features and to ensure the usability and reliability of the downloader remains in good standing.
This update will be downloaded automatically when you launch the app or you can manually download it here.
v2.5.5
- Added video support within the product carousel
- Improved and upgraded the downloader for better performance and reliability
- Updated livery ordering for improved organisation and usability
- Various backend changes -
v1.0.3 of iniBuilds Liverpool (EGGP) Premium for MSFS 2024 has been released. This is a small update to attach model to light preset.
This update can be downloaded via the iniManager.
v1.0.3
- Attached model to light preset -
iniBuilds A350 Airliner V1.2.5 Update 🚀
The A350 Airliner v1.2.5 update focuses on further refining system accuracy and improving overall stability, with a continued emphasis on WASM performance and consistency. Following extensive testing, the team have implemented a range of under-the-hood optimisations to memory handling, data efficiency, and system robustness within the MSFS WASM environment, resulting in smoother operation and more reliable behaviour, particularly during complex and high-load scenarios.
Alongside these core improvements, this update delivers a comprehensive set of fixes across key aircraft systems, addressing areas such as FMGS logic, flight guidance behaviour, navigation predictions, and MCDU functionality. Additional updates span across the EFB, sounds, and aircraft model, resolving issues with enroute mapping, missing alerts, and various animation and visual discrepancies, helping ensure a more polished and consistent experience throughout all phases of flight.
We’re excited to say that after considerable work and a strong focus on improving overall WASM stability, the team have implemented a range of under-the-hood optimisations throughout the latest testing phase. Many of our testers have already reported noticeable improvements in performance and consistency, particularly in more demanding scenarios. These changes target memory handling, data efficiency, and system robustness within the MSFS WASM environment, helping deliver a much more stable experience overall. Here's what we've done:- Optimised WASM performance and memory handling by reducing unnecessary data copying in key systems, lowering transient memory usage and improving overall efficiency within the MSFS WASM environment.
- Refined data access patterns to reduce unnecessary temporary copies, helping lower stack pressure and improve runtime consistency, particularly during high-load scenarios
- Added additional safety checks across critical memory pathways to guard against invalid states and edge cases
As mentioned above, these changes significantly improve overall stability and reduce the likelihood of WASM-related crashes, so be sure to download the latest updates, especially ahead of a busy Cross The Pond, coming this weekend!
This update can be downloaded via the iniManager.
V1.2.5
SYSTEMS ⚙️
FIXED Position time manual behaviour
FIXED Direct to behaviour
FIXED Fix page issue
FIXED Issue with Top of climb prediction
FIXED TO page not locking in fields when TO phase active
FIXED Fuel & load page
FIXED The aircraft GW & GWCG should be calculated/shown on the ED/PERMANENT DATA
FIXED ALT CSTR on ND
FIXED Issues with making waypoint-bearing
FIXED Deleting pilot waypoints selection exceeds the remaining number if waypoints
FIXED T/C marker missing in OP CLB
FIXED Altitude selection & flight phase logic during cruise
FIXED Green dot speed mismatch
FIXED "NOISE END" box appears on top of the previous "SPD CSTR"
FIXED FD Behaviour - Vertical Guidance Timing & Wind Shift SensitivityART 🎨
FIXED some bolts & other small parts are missing from the landing gear, & some are not attached to anything
FIXED APPR button not animated
FIXED EVA command guard does not open
FIXED Ext Model - Sun shades are mounted on exterior window instead of the interior ones
FIXED Rudder trim animation invertedEFB📱
FIXED Enroute map token loss in flight
FIXED Enroute map 403 error due to bad API callSOUNDS🔊
FIXED Missing "retard" callout
FIXED No windshear alertiniBuilds Team ❤️
-
10
-
 1
1
-
 1
1
-
iniBuilds A340 Airliner V1.0.11 Update 🚀
The A340 Airliner v1.0.11 update brings a strong focus on overall stability and performance within the MSFS WASM environment, alongside a range of targeted fixes across core aircraft systems. Following extensive internal work and testing, this update introduces under-the-hood improvements to memory handling, data efficiency, and system robustness, resulting in noticeably improved consistency, particularly during high-load and demanding scenarios.
In addition to these foundational enhancements, this update addresses several system-level issues affecting day-to-day operations, including corrections to flight deck indications, trim and hydraulic logic, navigation behaviour, and MCDU interactions. Together, these changes help deliver a more stable, predictable, and refined experience across all phases of flight, with a reduced likelihood of WASM-related instability.
We’re excited to say that after considerable work and a strong focus on improving overall WASM stability, the team have implemented a range of under-the-hood optimisations throughout the latest testing phase. Many of our testers have already reported noticeable improvements in performance and consistency, particularly in more demanding scenarios. These changes target memory handling, data efficiency, and system robustness within the MSFS WASM environment, helping deliver a much more stable experience overall. Here's what we've done:- Optimised WASM performance and memory handling by reducing unnecessary data copying in key systems, lowering transient memory usage and improving overall efficiency within the MSFS WASM environment.
- Refined data access patterns to reduce unnecessary temporary copies, helping lower stack pressure and improve runtime consistency, particularly during high-load scenarios
- Added additional safety checks across critical memory pathways to guard against invalid states and edge cases
As mentioned above, these changes significantly improve overall stability and reduce the likelihood of WASM-related crashes, so be sure to download the latest updates, especially ahead of a busy Cross The Pond, coming this weekend!
This update can be downloaded via the iniManager.
V1.0.11
SYSTEMS ⚙️
FIXED Deviation indication when no course tuned in VOR
FIXED Trim can be moved without hydraulic pressure
FIXED Issues with clearing scratchpad
FIXED Fix page formatting issues
FIXED Manually tuned navaids not resetting after landing
FIXED THS should be +4 deviation on cold and dark loadiniBuilds Team ❤️
-
2
-
iniBuilds TriStar Airliner V1.0.3 Update 🚀
Following last week’s V1.0.2 release, we’ve continued refining the TriStar Airliner with another focused update based off of community feedback. Version 1.0.3 brings a wide range of fixes across core systems, improving overall stability and day-to-day usability.
This update includes key fixes to autopilot/AFCS behaviour, INS navigation logic, fuel and electrical systems, engine operation, and various cockpit interactions and bindings. Flight handling has also been improved with smoother pitch trim, refined autothrottle behaviour, and more accurate climb performance.
Additional fixes have been applied across visuals, PFB usability, and sounds, with corrected callouts and improved audio consistency for a more immersive experience.
As always, we appreciate the continued feedback, more improvements are already on the way. Enjoy the TriStar Airliner! ✈️
This update can be downloaded via the In-Game Marketplace.
V1.0.3
SYSTEMS ⚙️- FIXED KW/KVAR indication shows zero for all generators
- FIXED APU fuel feed: starts & runs normally with the ENG2 tank valve closed
- FIXED 2L/2R tank gauge needle & drum disagree
- FIXED UNLOCK/REVERSE indications incorrect logic
- FIXED Generator values during cruise
- FIXED INS battery light illuminates with units OFF
- FIXED AP Disengage/AT TOGA/AT DISENGAGE Joystick bindings not working
- FIXED Fixed smoke detection panel & logic.
- FIXED CVR test doesn't work
- FIXED Engaging AP resets AFCS modes
- FIXED OVHD Panel Lights are linked to Floodlight Breaker
- FIXED AC Does not follow ILS GS when Captured
- FIXED Pitch Trim Oscillations
- FIXED ADF needle pointer works with ADF in OFF position
- FIXED HDG bug when on INS HSI mode
- FIXED Fuel temp cools down too quickly
- FIXED INS Nav is having difficulty dealing with a W->E Longitude transition if WP is all zeros
- FIXED INS MSU OFF shows BAT light on
- FIXED HYD: EDP off should light up LO PR lights
- FIXED Cabin Pressure Changes Randomly with no Change in Cabin Altitude
- FIXED ALT SYNC - should still allow baro to set via FO side
- FIXED Non-Functioning Circuit Breakers
- FIXED PMS gives too high climb EPR?
- FIXED INS CDU incorrect display for TK GS & HDG DA
- FIXED ENG1 & ENG3 wont start unless all packs are off
- FIXED Unable to control VHF COM1/2 independently
- FIXED Engine not starting despite sufficient pressure
- FIXED HSI INS time readout bug when counting down time
- FIXED ALT/GS conflict
- FIXED Cannot shut down engine 2 when APU running
- FIXED TCAS test pattern in VSI stuck
- FIXED INS wind display, value position inverted
- FIXED Fuel & Weight totalizer not matching actual load + jumping values
- FIXED F/E Clock Displays Local time & not UTC
- FIXED INS should be fully aligned on Runway spawn
- FIXED C&D: antiskid ON>OFF
- FIXED PMS mach control during climb inaccurate/slow to react
- FIXED Winwing throttle quadrant causinmg loss of IDLE calibration during the flight
- FIXED ATHR is too aggressive
ART 🎨
- FIXED Runway Spawn - all cockpit lights are off
- FIXED Fuel temp needle not animated between positions & just jumps
- FIXED Pedestal map minus sign missing from zoom buttons
PFB📜
- FIXED Cabin door open/close buttons text above is displaced to the left
- FIXED Autocomplete - Parking Checklist - APU shutdown due to FE turning off ENG 2 TANK VALVE
SOUNDS🔊
- FIXED CVR sounds
- FIXED "Cabin Is Ready" plays inconsistently
- FIXED C-chord should play 500ft before reaching level, currently 400ft
- FIXED TO Config warning audible in cabin
- FIXED Add sounds to RA
-
4
-
v1.0.2 of iniBuilds Liverpool (EGGP) Premium for MSFS 2024 has been released. This update enhances the overall airport atmosphere with the addition of static GA aircraft, more passengers in the check-in area, and expanded interior detailing throughout the terminal, including the passport control area and illuminated glass walkways. A number of fixes have been made to improve accuracy and consistency, such as correcting building colours, signage, and baggage belt numbering. Missing and misplaced objects like fencing, lighting, and gate signage have also been fixed.
This update can be downloaded via the iniManager.
v1.0.2
- ADDED some static GA aircraft
- ADDED people at check in area
- ADDED more interior detail to terminal
- ADDED lighting to terminal glass walkways
- ADDED Passport and Control Area detailing
- FIXED Baggage belt number ordering reversed
- FIXED Wrong shade - building color near gate 4
- FIXED Wrong shade - Liverpool Aviation Services hangar
- FIXED Tap+Brew instead of Estuary
- FIXED Missing fence at Stand 2/3/4
- FIXED Stand 52/53 gate sign positioning to align with centerlines
- FIXED Random fences next to RW27
- FIXED Missing lighting alongside Skyport terminal -
iniBuilds TriStar Airliner V1.0.2 Update 🚀
With continued feedback from the community, we’ve pushed ahead with another round of refinements to further improve the TriStar Airliner! Version v1.0.2 is now live via the In-Game Marketplace, delivering an extensive set of fixes and additions across systems, art, sounds, and the PFB. This update brings significant improvements to autopilot and flight director behaviour, VNAV/PMS logic, ILS functionality, and overall AFCS stability, alongside numerous corrections to engine, fuel, pneumatic, and cabin systems.
On the visual side, you’ll also find optimisations for VRAM usage, improved animations, lighting corrections, and additional immersion touches such as engine startup smoke. The PFB continues to evolve with new functionality including OFP re-download, brightness automation, and expanded auto flight engineer logic, while sound fixes address missing alerts and audio consistency.
As always, we really appreciate all the feedback so far, this update tackles a huge number of reported issues, and we’ll keep the improvements coming. Be sure to check out the latest version below and enjoy your flights with the TriStar Airliner! ✈️
This update can be downloaded via the In-Game Marketplace.
V1.0.2
SYSTEMS ⚙️- ADDED Weather Radar brightness control
- ADDED Flight recorder trip date
- FIXED Weather Radar ranges do not operate independently on CPT/FO Side
- FIXED High-pressure flow indicators illuminating without an active pneumatic supply
- FIXED Oil PRESS IND Test — pressure pointers fail to move to the 9 o’clock position
- FIXED Anti-skid test (normal and alternate) fails to display the correct test pattern
- FIXED FE GW and Total Fuel gauge unit values unit inverted (KG/LB) in some cases
- FIXED APU stop switch INOP when APU started via Panel State or F/E Autocomplete
- FIXED Pack flow and hot air indicators illuminate despite APU bleed being off
- FIXED S/O panel lights test logic — fire detection loop and wheel well fire tests illuminate incorrectly
- FIXED Engine Turbine Cooling Air Test Logic — A and B test switches incorrectly illuminate when pressed individually
- FIXED Cabin pressure control fault light does not illuminate during light test
- FIXED Fuel used reset function is inoperative
- FIXED RMI incorrectly points to ILS stations
- FIXED Wing anti-ice check valve operates without pneumatic air supply
- FIXED ALT ARM sometimes fails to engage
- FIXED PMS not transitioning to cruise phase; thrust remains at climb power
- FIXED PMS fuel entry limit capped at 159,900 lbs
- FIXED PMS exceeds VMO in POD version
- FIXED AP overshoots altitude in TM/VNAV mode
- FIXED AP TURB mode operates incorrectly
- FIXED AP descends more than 400 ft during turns in ALT mode
- FIXED AP does not compensate for crosswind in VOR and LOC modes
- FIXED AP does not engage via keybind or update AP variable
- FIXED AP ALT CAP levels off too high and then overcompensates
- FIXED AP VNAV behavior inconsistencies
- FIXED FD Guidance reliability in multiple scenarios
- FIXED AT inability to maintain speed
- FIXED ALT CAP instability
- FIXED AP climb modes may enter unintended descent during high-altitude turns and recover too slowly
- FIXED Fuel quantity test does not increase Total Fuel or Gross Weight indication
- FIXED Fuel Low Pressure lights do not illuminate when tank pumps are unlatched
- FIXED Wing anti-ice manual test does not display the expected OPEN indication when pneumatic pressure is available
- FIXED Engine Vibration Filter annunciator light does not illuminate during test
- FIXED Autospoiler disengage does not trigger DLC fail lights
- FIXED AFCS Vertical Modes incorrectly disengage when used with TM
- FIXED ILS missing LOC ARM flag
- FIXED Rudder can be moved without hydraulic power
- FIXED TOGA command activates command bars with flight directors disabled
- FIXED Cabin temperature displays in °F but operates in °C
- FIXED ENG 1 and 3 high-pressure bleed switches move automatically from ON to OFF
- FIXED Pack airflow (CFM) inconsistencies
- FIXED Incorrect ATS DISC flag when using TM
- FIXED ILS GS and LOC ARM modes do not reliably disengage HDG/ALT modes on capture
- FIXED Missing ICAO code in aircraft configuration
- FIXED ALT ALERT light continues flashing after ALT CAP
- FIXED Avionics air indication should read OVBD/OVBD when on the ground
- FIXED Engine 1 rolls back when increasing throttle in specific conditions
- FIXED Captain and FO ASI overspeed needles mismatch
- FIXED INS1 does not correctly follow position offset
- FIXED INS drift rate too low
- FIXED Aircraft powered off on aerial spawns
- FIXED Missing tooltip for ENG TURB COOLING AIR test B
- FIXED Auto brake ARMED light does not illuminate during takeoff
- FIXED Stab auto trim warning light illuminates with AP off
- FIXED Flight Deck Clocks should display UTC instead of local time
ART 🎨
- ADDED Engine smoke FX during startup
- ADDED Cockpit - Registration placard assets (Paintkit Update)
- FIXED High VRAM usage on 8GB GPUs
- FIXED Thrust reverser door animation tied incorrectly to throttle position
- FIXED CPT / FO DME readout mismatch
- FIXED Engine 2 Components not attached to cowling animation
- FIXED Shifted INS map forward for better visibility in VR
- FIXED OVHD windshield Heat panel Korry lights fail to illuminate
- FIXED Object flickering affecting both PIC and SIC side windows
- FIXED ADI fast/slow indicator animation inverted
- FIXED EFDARS Flight Numbers animation
- FIXED FO weather radar range and intensity knobs do not match markings
- FIXED Inconsistent strobe patterns and aircraft lighting
- FIXED Typo “RELAMPING” on RAM AIR TURBINE switch
- FIXED Faint red glow visible near parking brake lights when C&D
- FIXED Increased ADI Pitch Ref marker brightness for sky portion
- FIXED Runway turnoff lights not operational
- FIXED Audio panel transmit switches do not illuminate when pressed
- FIXED Transponder ALT switch does not move between positions
- FIXED Position lights illuminate aft of aircraft incorrectly
- FIXED TWA N11006C - decals not attached to cargo doors (Livery Update)
- FIXED TWA N11006C fuselage grey texture artifacts (Livery Update)
- FIXED Pan Am - texture clipping on right main gear door (Livery Update)
PFB📜
- ADDED OFP re-download functionality
- ADDED Keyboard Input Lock option
- ADDED 7-sec timeout to PFB text field entry focus
- ADDED Automatic PFB and TOLD Card brightness adjustment based on time of day
- ADDED Auto F/E APU start enables bleed air following APU startup
- ADDED Auto F/E APU shuts down APU during after-start flow
- ADDED Ability to manually modify cargo hold weight values in PFB
- FIXED FPS drops on PFB loadsheet, takeoff performance, and landing performance pages
- FIXED PFB stuck in keyboard interaction mode if camera moved away
- FIXED Charts do not update destination following OFP update
- FIXED PFB pushback INOP
- FIXED Auto F/E After start sets flaps per TOLD card
- FIXED Lower minimum brightness threshold of PFB Brightness slider for night operation
SOUNDS🔊
- FIXED Audio loss when switching camera views
- FIXED Missing Cabin Altitude Warning horn
- FIXED Missing Fire Warning Test aural alerts
iniBuilds Team ❤️
-
6
-
iniBuilds TriStar Airliner V1.0.1 Update 🚀
This is the first update for the TriStar Airliner! Following the incredible response since release, we want to say a huge thank you for all the support and feedback so far. Version 1.0.1 focuses on refinement, stability, and improving the overall experience across the aircraft. The update brings a wide range of fixes to core systems, including improvements to autopilot and flight director behaviour, VNAV/PMS performance, ILS logic, and engine/pressurisation systems. Numerous cockpit interactions and annunciations have been corrected, alongside better handling of spoilers, autobrake, and environmental systems for more consistent operation.
On the visual side, this update refines cockpit and exterior details with fixes to animations, lighting, weathering, and multiple livery corrections, as well as the addition of interactive elements like operable lavatory doors. The PFB has also been improved with better brightness control, more accurate takeoff data handling, and added functionality, while the sound environment sees further polish with corrected callouts and improved behaviour.
As always, we’ll continue to monitor feedback closely, so please keep it coming!
This update can be downloaded via the In-Game Marketplace.
V1.0.1
SYSTEMS ⚙️
FIXED INS MSU not detented to/from NAV position
FIXED Light test switch doesn't fully illuminate all annunciators (especially on Main Instrument Panel)
FIXED Cabin climb indicator makes occasional leaps up & down when sitting still on the ground
FIXED Gear lever desyncs when using peripherals
FIXED TM not respecting PMS constraints at calculated value
FIXED Speed vertical modes need to command pitch much more readily
FIXED ILS mode remains on with AP/FD off
FIXED FD ILS LOC guidance unsatisfactory
FIXED Very cold cabin temperature
FIXED PMS VNAV control is not fast or accurate enough leading to consistent speed under/overshoots
FIXED Cabin lights remain on with no elec. power
FIXED Engine 1 & 3 anti ice ON not illuminating HEAT
FIXED Pressurization PSI needle animation issue
FIXED TOGA flag still missing from AFCS mode annunciator
FIXED Incorrect ATS DISC flag when using TM
FIXED Spoiler lever retracts automatically after landing
FIXED Ground spoilers not extending fully on reverse selection
FIXED Cabin heat not increasing past indicated limit
FIXED Autobrake simulation
FIXED Fire detection loop test knobs & Fire bell sound.
FIXED Nacelle/pylon ovht detection test knobs & emissive.
FIXED Engine turbine cooling air panel test emissive.
FIXED Wheel well fire test panel
FIXED Humidity control panel button animation.
FIXED Forward cargo compartment logic for guarded switches with labels.
FIXED N2 test buttons & logic
FIXED Engine oil, temp & press test buttons & logic
FIXED #3 Engine TGT & all Celsius Gauges INOP
FIXED Rudder Axis binding issue for gamepad controller
FIXED FMA test doesn't work on F/O side
FIXED Fire Bell cutout requires subsequent press to silence alarm
FIXED Walkaround - ACU disconnects immediately after clicking on air vent
FIXED Auto throttle not disconnecting when weight on wheels has above nil value
FIXED SPOILER ON/OFF control commands not working
ADDED Circuit breaker animation and wired to basic electrical system functions.
ADDED Tooltips to all CB.ART 🎨
FIXED Wipers are floating above windshield
FIXED Standby altimeter animation error
FIXED ADF freq has no integral light
FIXED Transponder digits are brighter than comm radios
FIXED Excessive weathering effect
FIXED Jetbridge attempts to connect to lounge even in non-lounge variants
FIXED Door profile incomplete? See reference
FIXED Wipers do not wipe away moisture on windshield
FIXED Covert sunshades to draggable element
FIXED Mechanic collision with ENG1 doors
FIXED Wipers in any LOD other than 0 are in the old parked position
FIXED Hole in rear of fuselage near APU exhaust
FIXED Cockpit window tint too dark
FIXED Cargo doors weathering displaced, floating above model
FIXED Aircraft Weathering not parented to door animations
FIXED Weathering elements on tail floating above fuselage
FIXED z-fighting on wings with weathering enabled
FIXED Cathay VR-HHX - Door decals in cabin
FIXED Novair - Logo mirrored and font accuracy
FIXED All Liveries - Cockpit Placard Shows G-STAR / AB-CD Instead of Actual Reg/Selcal
ADDED Operable lavatory doorsPFB📜
FIXED Tie Takeoff card brightness to selected EFB as decided by priority switch
FIXED Auto-Complete on start doesn't match flaps from calculated value
FIXED Reduced overall brightness at night
ADDED Can now switch between T/O & Land cards with top of card pressSOUNDS🔊
FIXED v1 & rotate calls when play when decelerating to bugged speediniBuilds Team ❤️
-
2
-
-
v1.0.1 of iniBuilds Liverpool (EGGP) Premium for MSFS 2024 has been released. This update brings a number of small improvements across the airport, including corrected stand details, updated runway markings, and added approach lighting. Various missing objects like fencing, vehicles, and stand numbering have also been addressed.
We’ve also fixed issues with walkaround mode, GSX passenger access, floating vehicles, and missing textures, alongside adding a bit more detail to the terminal interior for a more complete feel.
This update can be downloaded via the iniManager.
v1.0.1
- Corrected size for Stand posts on Stand 54/55/56
- Added missing approach light models
- Updated runway touchdown zone markings to match 2026 references
- Resolved terraforming issue inside of Skyport hangar
- Added missing fence next to Ravenair
- Added cars at control tower
- Resolved walkaround mode issues (invisible barriers and dropping through floors)
- Resolved floating fuel trucks
- Opened gates to allow GSX passenger walk points
- Added details to terminal interior (restaurants and shops)
- Fixed missing textures on GSE
- Added missing stand number to Stand 12 -
🌆 Welcome to Liverpool John Lennon Airport (EGGP) ✈️
Step into one of the UK’s most vibrant and historic cities, where rich cultural heritage meets modern aviation. Liverpool John Lennon Airport (EGGP) has been brought to life in stunning detail for Microsoft Flight Simulator 2024, capturing the unique charm and character of this iconic northern hub.
Available now for just £11.99 (excl. VAT)
Buy Now: https://inibuilds.com/products/inibuilds-liverpool-eggp-msfs-2024
Discover Liverpool John Lennon Airport!
Located just southeast of Liverpool city centre, EGGP serves as a key gateway to North West England, connecting the region to destinations across the UK and Europe. Known for its efficient layout and steady mix of low-cost, charter, and private aviation traffic, Liverpool offers a dynamic and engaging flying experience.
From busy apron operations to the nearby River Mersey and surrounding urban landscape, this rendition captures the atmosphere of EGGP with precision. Watch the airport come alive with immersive details, including animated airside buses transporting passengers across the apron and sailboats moving along the nearby waterfront, adding life beyond the runway.
Carriers & Routes
Liverpool sees a diverse range of operations throughout the year:- easyJet & Ryanair – Extensive European low-cost network
- Jet2 & TUI Airways – Popular leisure and charter destinations
- Aer Lingus Regional – Key connections to Ireland
- General Aviation & Business Traffic – Regular movements across the region
Whether you're operating a short hop across the UK, heading into Europe on a packed holiday flight, or managing turnaround ops on a busy apron, EGGP delivers a lively and authentic UK airport experience.
Scenery Features
- Custom ground textures across the entire airport
- Realistic runway and taxiway layout based on latest charts
- Highly detailed terminal and airside buildings with interior detail and parallax effects
- Animated airside buses bringing the apron to life
- Animated sailboats along the nearby waterfront for added immersion
- Detailed landside area with custom assets and surroundings
- Fully custom night lighting across the airport
- GSX profile included
- Custom taxiway signage
- High-quality, performance-optimized textures
- Realistic UK-specific airside clutter and ground equipment
- Surrounding buildings and environment modeled in detail
- Optimized models with Level of Detail (LOD) for smooth performance
- Hidden Easter Eggs – keep an eye out! 👀
📽️ Watch the Trailer
From busy apron activity to scenic approaches over the River Mersey, Liverpool Airport (EGGP) offers a uniquely British flying experience. Expect lively operations, detailed surroundings, and a handcrafted atmosphere that truly brings this regional airport to life.
iniBuilds Team ❤️
-
2
-
v1.1.1 of iniBuilds Manchester (EGCC) for MSFS 2024 has been released. This update fixes some minor terrain issues, some erroneous taxi edge lighting and stop bar lighting and more.
This update can be downloaded via the iniManager.
v1.1.1
- Fixed terrain issues along the airport south side
- Taxi edge light showing on one centreline
- Terrain fixes around commercial area
- Misplaced stop bar lighting
- Fixed bump on K/J transition
- Changed custom stop lighting so that it no longer shows during the loading map -
✈️ Welcome to the iniBuilds TriStar Airliner⭐Step into the cockpit of one of aviation’s most iconic widebody aircraft, faithfully recreated for Microsoft Flight Simulator 2024. The TriStar represents a unique era of aviation, combining advanced automation for its time with classic analogue charm, and now, it’s ready for you to experience like never before!
Available Now via the In-Game Marketplace for $49.99! (excl marketplace location based VAT)
Over 40+ liveries are available to download via the iniManager: https://inibuilds.com/pages/inimanager-v2
From its unmistakable tri-jet design to its highly unique flight systems, the TriStar delivers a flying experience unlike anything else in Microsoft Flight Simulator 2024. Whether you're managing the aircraft’s intricate systems, flying precision approaches, or cruising long-haul historic routes, every moment captures the essence of this legendary airliner.
With a deep focus on authenticity, the TriStar challenges you to think differently, blending traditional navigation techniques with innovative systems that were ahead of their time. This is not just another aircraft, it’s a completely different way of flying!
Aircraft Features
Systems
- Detailed RB211 engine simulation with authentic EPR logic, spool behaviour, and realistic thrust response
- Detailed AFCS simulation with CAT IIIB auto land capability.
- Accurate Direct Lift Control (DLC) system for precise glidepath control without excessive pitch input
- Complete hydraulic, pneumatic, and electrical systems with realistic redundancy and load management
- Fully interactive Flight Engineer station with real-world procedures and system monitoring
- Optional Virtual Flight Engineer with flow-based automation, callouts, and dynamic interaction
- Flexible navigation philosophy (RADNAV, INS, GPS, INS+GPS) selectable via PFB
- Realistic fuel system and transfer logic implemented using the modern fuel system with fully modelled valves and pump behaviour.
- Advanced environmental and pressurisation systems with zoned temperature control and reversion modes
- Integrated moving map & INS waypoint management, including SimBrief route import capability
- Fully simulated triple INS system, supporting authentic waypoint entry, alignment, and inertial navigation workflows
- Realistic INS behaviour and drift modelling, with aircraft position based on alignment accuracy and in-flight updates
- Integrated Performance Management System (PMS) providing advanced VNAV capability when using INS-based navigation modes
- Seamless INS + PMS integration, enabling a hybrid workflow that blends classic inertial navigation with modern vertical guidance
Visuals
- Realistic lighting environment with cockpit, cabin, and exterior systems tuned for all conditions
- Highly detailed TriStar cockpit recreation, including Captain, FO, and full Engineer station
- Realistic wear-and-tear texturing with aged materials, scratches, and operational grime
- Fully modelled passenger cabin with period-correct layout, materials, and lighting tone
- Optional lower lounge configuration with spiral staircase and detailed lower deck environment
- Detailed cargo bay and structural modelling
- Accurate PBR material system with dynamic lighting response across all surfaces
- Fully animated control surfaces and landing gear with real-world sequencing and behaviour
- Dynamic wing flex, engine vibration, and environmental effects for added realism
- Included POD variant with visual modifications and unique operational characteristics
Sounds
- Professionally recorded real-world L-1011 audio captured at the TriStar Experience by Echo19 Audio Productions
- Authentic RB211 engine sound profile, from spool-up to cruise and reverse thrust
- Detailed cockpit ambience, including switches, avionics hum, and airflow
- Immersive cabin environment audio, reflecting phase of flight and aircraft state
- Dynamic environmental sound transitions between interior and exterior perspectives
- High-quality system and mechanical audio feedback across all interactions
- Integrated Virtual Flight Engineer, First Office and Flight Attendant voice callouts for realistic crew coordination
- Reactive audio layering based on power, speed, and environment for a living sound suite
Art & Effects
- Physically accurate lighting system using real-world intensity and colour references
- Fully dynamic cockpit lighting suite, including panel, flood, pedestal, and Flight Engineer station lighting
- Realistic exterior lighting behaviour across weather, fog, and night conditions
- Dynamic heat blur and engine exhaust effects tied to power output
- Subtle airframe vibration and motion effects enhancing aircraft weight and presence
- Authentic incandescent-style cabin lighting for period-correct atmosphere
- Advanced ambient occlusion and shadowing for depth and realism in all lighting conditions
- Smooth light transitions between day, dusk, and night operations
- Enhanced reflection and material response across cockpit and exterior surfaces
- Cohesive visual atmosphere capturing the “golden era” of widebody aviation
PFB
- Unique period-inspired “Paper Flight Bag” replacing modern EFBs with an analogue feel
- Built-in Flight Engineer Autocomplete system for full or partial aircraft setup
- Integrated SimBrief import for route, fuel, and payload synchronisation
- Interactive loadsheet and CG management with real-time visual feedback
- Customisable fuel and payload loading with dynamic aircraft response
- Intuitive performance calculator with simple step-by-step takeoff & landing setup
- Styled OFP (Operational Flight Plan) with realistic dispatch-style layout
- Integrated chart system supporting LIDO & Navigraph with pinning and search
- Aircraft ground services and state control panel (doors, GPU, air start, pushback)
- Central hub for navigation mode selection and aircraft configuration preferences
From short regional hops to long-haul transatlantic crossings, the TriStar operated across the globe with airlines like Delta, British Airways, Eastern, and many more. Recreate these historic routes or forge your own across a wide range of destinations, from busy international hubs to scenic regional airports.
Fly classic routes from hubs such as London Heathrow, Dubai, Manchester, and Honolulu, or explore lesser-known operations that defined the TriStar’s legacy. Pair it with historic flight data tools like FlightSim Dispatch to bring even more realism into your operations.
As always, thank you for your continued support ❤️
We can’t wait for you to dive in and experience this iconic aircraft for yourself! If you’re just getting started, we highly recommend taking some time to explore the FAQs, read through the manual, and watch the “Welcome To” video, these will give you everything you need to get up and running and make the most of your first flights.
Watch the Trailer 🎥
Watch the Welcome To 🎥
Happy Flying!
The iniBuilds Team ❤️


iniBuilds A340 Airliner for Microsoft Flight Simulator 2024 v1.0.12 Released
in Updates
iniBuilds A340 Airliner V1.0.12 Update 🚀
The A340 Airliner v1.0.12 update continues our ongoing focus on stability and reliability within the MSFS WASM environment. This update introduces further WASM stability enhancements alongside a fix for the flickering EFB pause message that could occur during heavy simulator load states since SU5, helping to provide a smoother and more consistent experience during demanding operations.
This update can be downloaded via the iniManager.
V1.0.12
SYSTEMS ⚙️
FIXED - WASM Stability enhancements
EFB 📱
FIXED Flickering EFB pause under heavy sim load states since SU5
iniBuilds Team ❤️