

About This File
The ZDP Library is intended for use in conjunction with the MisterX library. The purpose of this library is to provide a common location for all of the frequently used assets in ZDP sceneries. It is structured in such a way that any scenery developers can use our assets to create sceneries just as good as ours, without the hassle of creating textures and assets from scratch. Because the primary role of the library is to hold assets which are created for ZDP sceneries we don't intend to add new assets unless they are of use in a new project. A guide for how to use the library is included in the readme (and also is transcribed below).
For questions with how to use the library please go to our discord server
Usage Guide
Markings
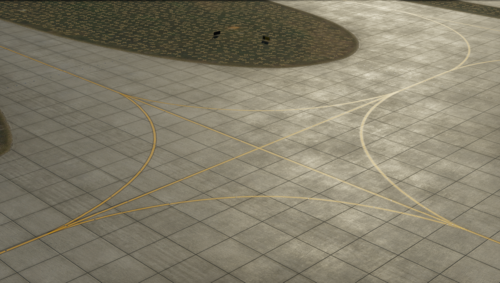
Lines - Use these just like any other library.
Paint - Draw paint over top of existing ground textures. These will automatically be rendered on top of any concrete or asphalt textures. Paint is great for filling in large areas or making custom runways. Use the "paint_border" lines to draw a border around your painted shape.
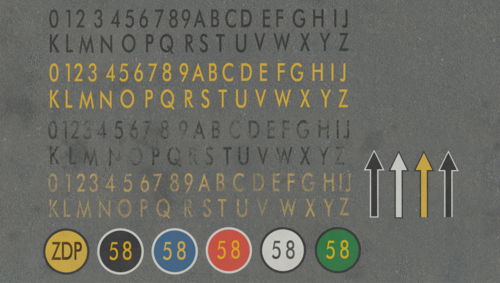
Signs - These are done as subtextured sheets. Click on the letter you want to place and then draw it as a rectangle to create a polygon. You can click a letter multiple times to change the edges. These use the same coordinates as the default xplane signs so upgrading existing signs is as easy as changing the resource value.
Painted Text - Good for things like gate numbers. Place a circle (or draw your own shape using paint) and place your text on top.
Runway Markings - Use these objects to draw markings on runways. Use the associated "_border" objects to add a black border if needed.
Grunge - place these as objects. Don't be afraid to overlap a few on top of eachother if you want a darker effect!
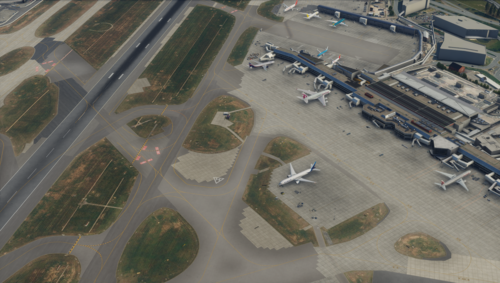
Ground Textures
Video Tutorial
Step 1: Place the base textures (concrete or asphalt). Make note of the naming convention for base textures to ensure you get exactly what you need. Note that WED doesn't show decals in the preview, you'll need to load into xplane to see the full effect. All variation and surface types and be seen from the included Surface_Guide.png and Variation_Guide.png images.
> <Surface>_<Wear Level>_<Variation Type>.pol
> ex. concrete/flat_worn_striped.pol is a flat concrete slab with a worn surface, and randomly varying darkness along 1 axis
Step 2: Place your overlays. Duplicate each surface, pick the color or darkness you want your surface to have and replace the "resource" value to apply the overlay. Overlays can be stacked too if you need even more control! Just be sure to use the overlay specified for the surface you are applying it to as each overlay is tuned specifically for the surface it is used on top of.
Step 3 (Optional): Create a custom grunge mask. See the video linked above for an overview of what this is. This is a more advanced technique but provides signifigant visual improvements.
Step 4 (Optional): Add spot grunge. Using the default laminar "Grunge1" and "Grunge2" objects, place spot ground around the airport to improve the realism and break up large uniform surfaces.
Download size: 1.0GB
Edited by StableSystem
What's New in Version 1.2
Released
- Completely reworked asphalt and added lots of new variants
- Added grooved asphalt
- Added runway markings
- Added painted text
- Added new concrete variants and improved existing ones
- New weather effects
- Added light grunge type
- Added stop markers for ICN
- Adjusted paint colors
- Added some missing worn line variants
- Depreciated asphalt smooth 2
- Various minor bug fixes, too many to count
